How to migrate WordPress from FlyWheel to Wordify
We’ve recently had a large number of new clients coming from FlyWheel and run into some problems migrating their WordPress sites across due to FlyWheel modifying the Core files in a way that’s not compatible with other hosts. If you are having problems migrating your sites away from getflywheel.com to Wordify or any other platform here is an article to get you up and running.
Be aware this process is quite involved. We offer free migrations to the Wordify platform so if you are coming across from FlyWheel please feel free to contact our support team and we can complete these steps for you.
Migrate your files and Database
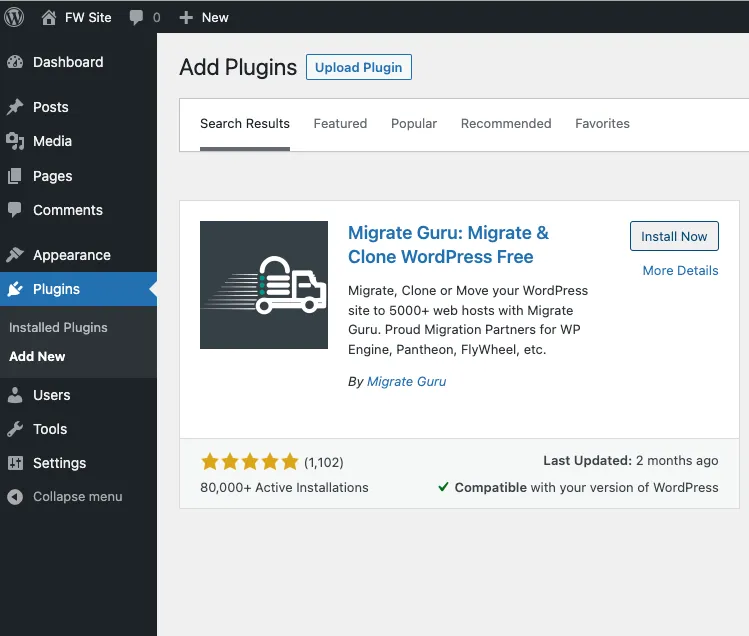
There are many different options to move your files and database from one host to another. You can use one of the many great plugins available or manually export and reimport the files and database over SSH/SFTP. We find the easiest option that we recommend is to use a plugin such as Migrate Guru or All In One WP which both provide excellent free options. In this example I’ll use Migrate Guru to move a WordPress site from fw-site.flywheelsites.com on FlyWheel to a new site on Wordify at wordify-site.wordifysites.com.
Step 1 – Add Wordify Site
Step 2 – Install Migrate Guru
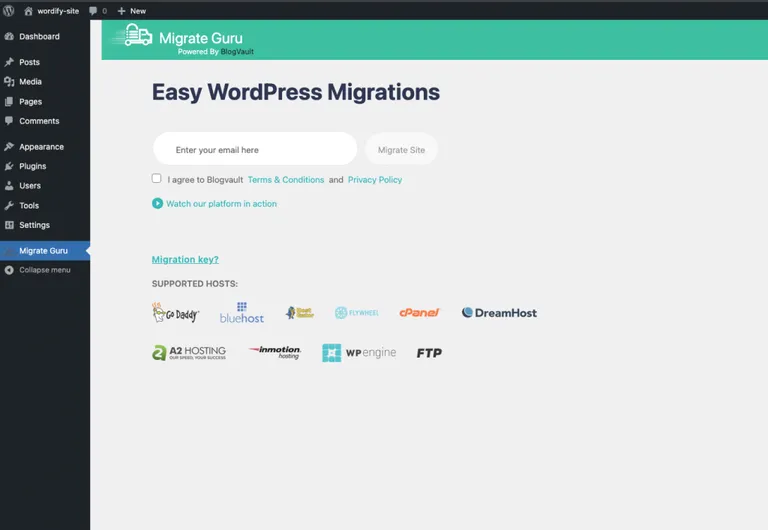
Step 3 – Migrate Site from FlyWheel to Wordify

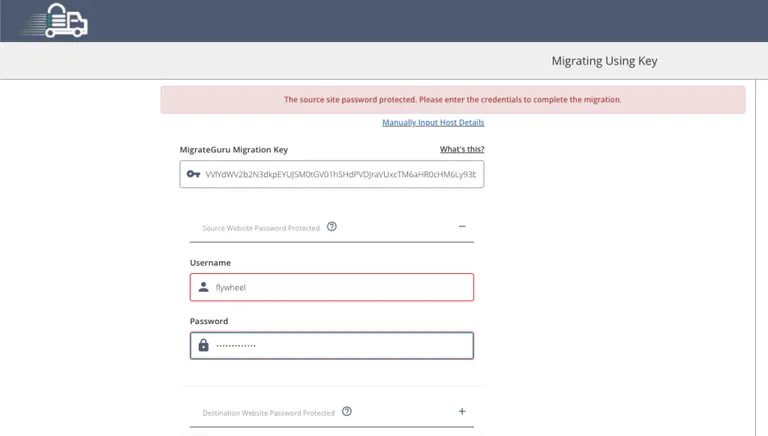
copy the key ready for pasting shortly.
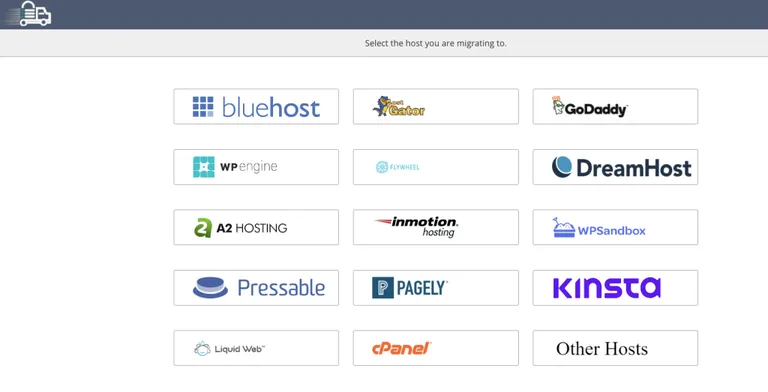
Now in the WordPress Dashboard of your source site open Migrate Guru, type in your email addess and click the Migrate Site button. On the following screen select Other Hosts
One the following screen we are ready to paste in the Migration key for our destination that we saved earlier. Paste in the Key and start the migration.
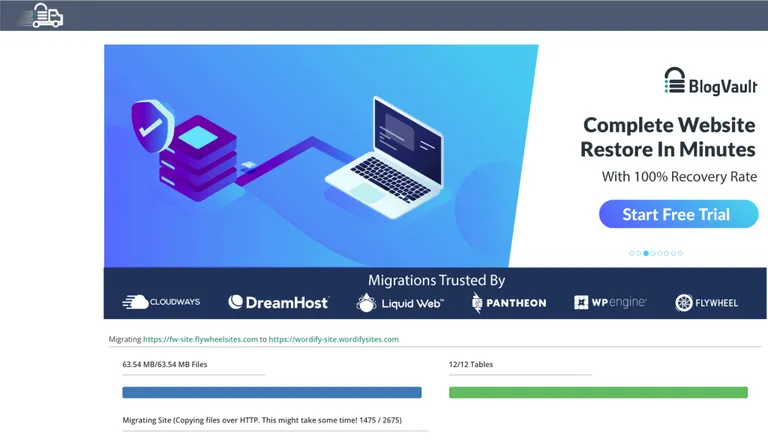
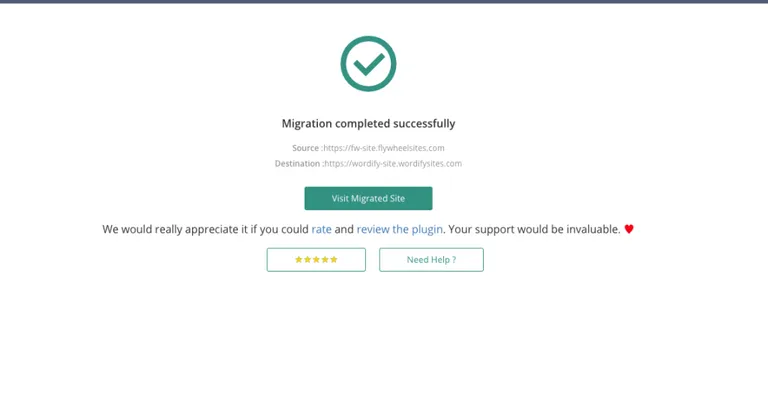
Once the database and files have been moved across to Wordify you will see the Migration Completed Souccessfully page in Migrate guru.
Now if you attempt to navigate to your destination site you will see an error “There has been a critical error on your site”. This is ok, this is a result of FlyWheel having modified the WordPress core files in an incompatible way and I’ll show you how to fix the issues.

Step 4 – Fix FlyWheel wp-settings.php Errors
					[12-May-2023 05:29:04 UTC] PHP Fatal error:  Uncaught Error: Undefined constant "FLYWHEEL_PLUGIN_DIR" in /home/myuser/public_html/.fw-config.php:12
Stack trace:
#0 /home/myuser/public_html/wp-settings.php(376): include_once()
#1 /home/myuser/public_html/wp-config.php(97): require_once('/home/myuser/...')
#2 /home/myuser/public_html/wp-load.php(50): require_once('/home/myuser/...')
#3 /home/myuser/public_html/wp-blog-header.php(13): require_once('/home/myuser/...')
#4 /home/myuser/public_html/index.php(17): require('/home/myuser/...')
#5 {main}
  thrown in /home/myuser/public_html/.fw-config.php on line 12
To fix this error edit the wp-settings.php and remove the following line.
include_once( ABSPATH . "/.fw-config.php" );
you can also remove the hidden file .fw-config.php as it is no longer required.
This will fix your critical error and you will now be able to login to your WordPress Dashboard. However there are a few more steps that need to be completed.
Step 5 – Overwrite FlyWheel dummy .htaccess file
FlyWheel does not run apache and they put a default .htaccess file on there platform which when migrated causes problems for platforms that are apache compatible. There default .htaccess file looks like this.
					#      _   _   ____  _______  _____  _____  ______
#     | \ | | / __ \|__   __||_   _|/ ____||  ____|
#     |  \| || |  | |  | |     | | | |     | |__
#     | . ` || |  | |  | |     | | | |     |  __|
#     | |\  || |__| |  | |    _| |_| |____ | |____
#     |_| \_| \____/   |_|   |_____|\_____||______|
#
# Flywheel does not use Apache, so changes you make to this file
# will not affect your site in any way. This file is kept here
# for plugins that error without .htaccess access.


# BEGIN WordPress
# The directives (lines) between "BEGIN WordPress" and "END WordPress" are
# dynamically generated, and should only be modified via WordPress filters.
# Any changes to the directives between these markers will be overwritten.

# END WordPress
This .htaccess file needs to be replaced with the default WordPress configuration below.
					# BEGIN WordPress
RewriteEngine On
RewriteBase /
RewriteRule ^index\.php$ - [L]
RewriteCond %{REQUEST_FILENAME} !-f
RewriteCond %{REQUEST_FILENAME} !-d
RewriteRule . /index.php [L]
# END WordPress
Note if you are running a multisite installation the default .htaccess configuration will be different and you can find more details on the correct configuration for your multisite installation here https://wordpress.org/documentation/article/htaccess/
Step 6 – Set MySQL Database configuration
To fix these issue you need to add a specific DB_CHARSET and DB_COLLATE configuration. Simply add the following two lines to your wp-config.php file
define( 'DB_CHARSET', 'utf8' );
define( 'DB_COLLATE', '' );
Step 7 – Replace all core files
					**
 * Copies a directory from one location to another via the WordPress Filesystem
 * Abstraction.
 *
 * Assumes that WP_Filesystem() has already been called and setup.
 *
 * @since 2.5.0
 *
 * @global WP_Filesystem_Base $wp_filesystem WordPress filesystem subclass.
 *
 * @param string   $from      Source directory.
 * @param string   $to        Destination directory.
 * @param string[] $skip_list An array of files/folders to skip copying.
 * @return true|WP_Error True on success, WP_Error on failure.
 */
function copy_dir( $from, $to, $skip_list = array() ) {
        global $wp_filesystem;

/** Commenting out FlyWheel Custom Code
$files = fcp_copy_dir($from, $to, FS_CHMOD_FILE, FS_CHMOD_DIR, $skip_list);
        if ( false !== strpos( $files, 'FCP Operation Error' ) ) {
                return new WP_Error($files, $to);
        }
        $file_list = explode("\n", $files);
        foreach ($file_list as &$file) {
            wp_opcache_invalidate($file);
        }
        return true;
*/

      $dirlist = $wp_filesystem->dirlist( $from );

        if ( false === $dirlist ) {
                return new WP_Error( 'dirlist_failed_copy_dir', __( 'Directory listing failed.' ), basename( $to ) );
        }

        $from = trailingslashit( $from );
        $to   = trailingslashit( $to );

        foreach ( (array) $dirlist as $filename => $fileinfo ) {
                if ( in_array( $filename, $skip_list, true ) ) {
                        continue;
                }

                if ( 'f' === $fileinfo['type'] ) {
                        if ( ! $wp_filesystem->copy( $from . $filename, $to . $filename, true, FS_CHMOD_FILE ) ) {
                                // If copy failed, chmod file to 0644 and try again.
                                $wp_filesystem->chmod( $to . $filename, FS_CHMOD_FILE );

                                if ( ! $wp_filesystem->copy( $from . $filename, $to . $filename, true, FS_CHMOD_FILE ) ) {
                                        return new WP_Error( 'copy_failed_copy_dir', __( 'Could not copy file.' ), $to . $filename );
                                }
                        }

                        wp_opcache_invalidate( $to . $filename );
                } elseif ( 'd' === $fileinfo['type'] ) {
                        if ( ! $wp_filesystem->is_dir( $to . $filename ) ) {
                                if ( ! $wp_filesystem->mkdir( $to . $filename, FS_CHMOD_DIR ) ) {
                                        return new WP_Error( 'mkdir_failed_copy_dir', __( 'Could not create directory.' ), $to . $filename );
                                }
                        }
                        // Generate the $sub_skip_list for the subdirectory as a sub-set of the existing $skip_list.
                        $sub_skip_list = array();

                        foreach ( $skip_list as $skip_item ) {
                                if ( 0 === strpos( $skip_item, $filename . '/' ) ) {
                                        $sub_skip_list[] = preg_replace( '!^' . preg_quote( $filename, '!' ) . '/!i', '', $skip_item );
                                }
                        }

                        $result = copy_dir( $from . $filename, $to . $filename, $sub_skip_list );

                        if ( is_wp_error( $result ) ) {
                                return $result;
                        }
                }
        }

        return true;
}
once that is completed you can reinstall WordPress core files by navigating to Dashboard > Updates and click on the Re-Install Version button.
Congratulations! At this point you will have a fully functioning migrated website free from FlyWheels customizations.